Just like maintaining your good health, early detection is the key to maintaining a charger cord’s good condition. As soon as you see any sign of cracking or breakage in the cable’s outer skin, you should immediately apply a layer of Cord-Fix around the break.
Sometimes, though, there is no warning when a fray will start. In the blink of an eye, your perfectly fine charging cable can become seriously frayed. And that’s ok. It happens. Just apply Cord-Fix ASAP to easily mend the frayed area, and carry on.
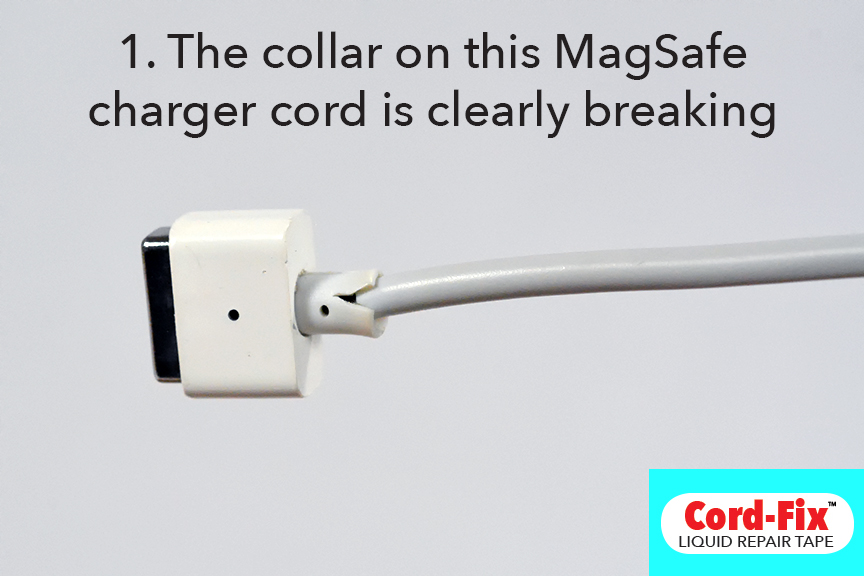
Other times, though, you can see it slowly begin. A tiny crack appears in the vinyl cover. or in the tiny flange joint between the cable and the connector. It just happened to me. My first instinct? I ignored it, which is hilarious because I’m Mr. Cord-Fix himself! A tiny crack appeared, and for a week I did nothing, too busy to be bothered, or tbh just too lazy. Sigh.
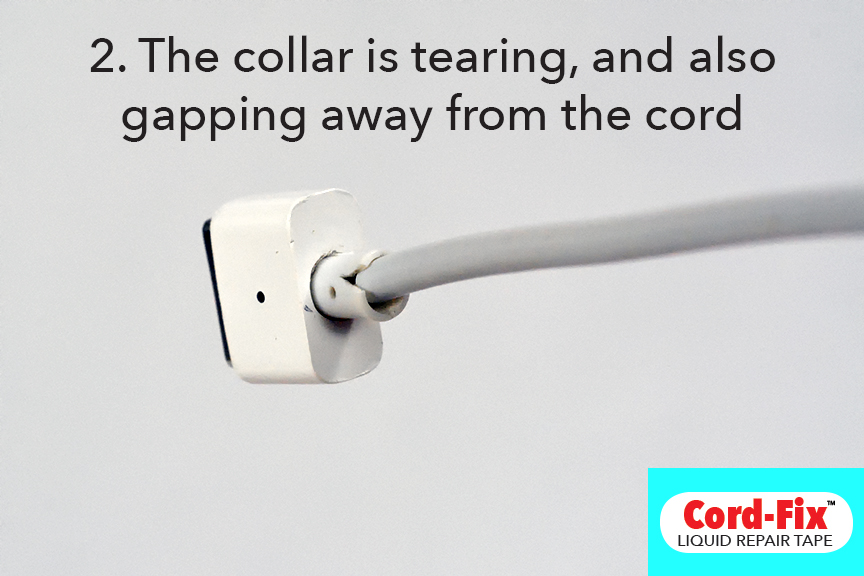
But after about a week, the crack had expanded far enough so that I could actually see some bare wire underneath the cord cover. That’s not good. Why? In my experience, once the vinyl cord cover starts peeling off, those bare wires are at risk for breakage and permanent damage. Cord-Fix can repair a fraying cable, but it can’t make a non-functioning cord functional again. Without its protective outer covering, that cord is eventually going to break, and probably soon.
As this was a MagSafe cable that I use for charging my MacBook Pro, I REALLY didn’t want to spend the big bucks an a replacement cord.Those MagSafe laptop charging cords are super expensive. Even though this one was a non-Apple generic charger cord, it was still nearly $40. No thanks. But the same goes for any kind of low-voltage, vinyl-wrapped cord, like those for mobile or smart phone chargers, laptop, and even game controller cords, headphone and earbud cables. Cord-Fix prevents any low-voltage cable from fraying.
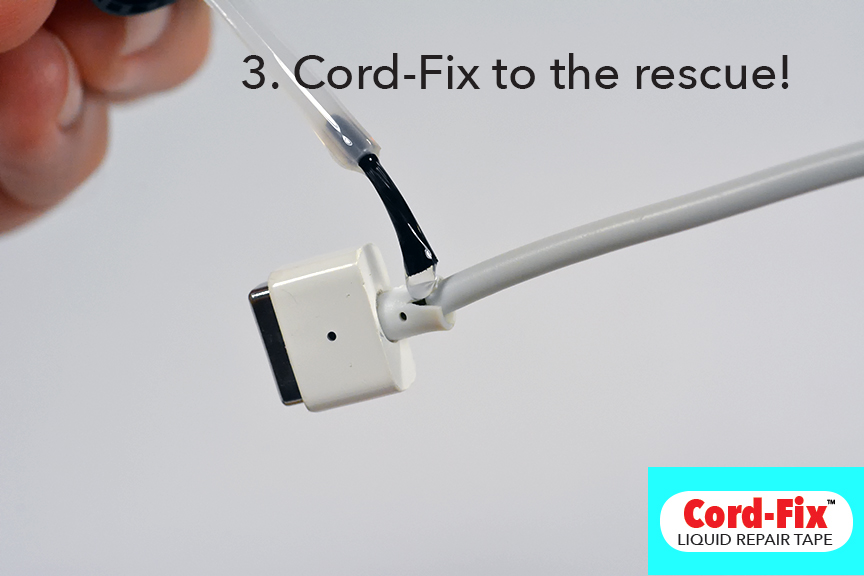
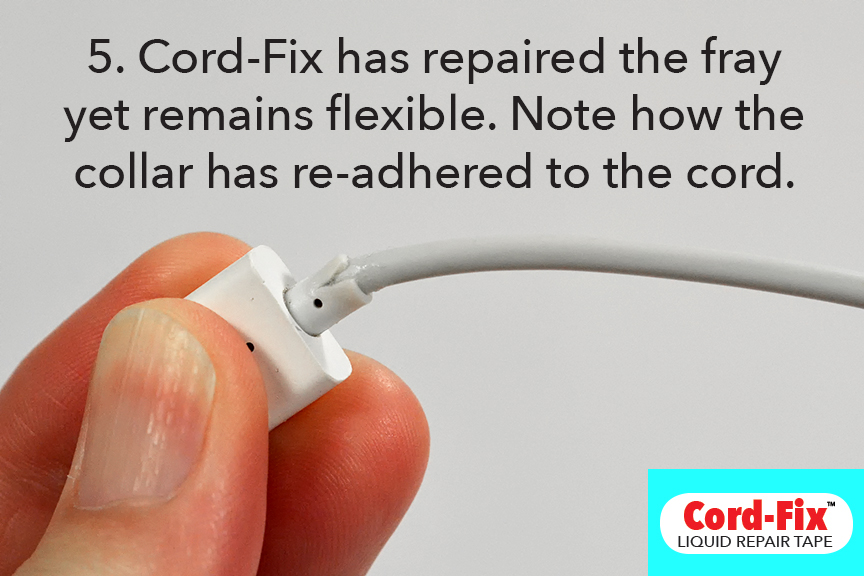
So as you see in the pictures below, I gave this laptop charging cable just one coat of Cord-Fix. I used just two drops, to be very specific. The first drop was used to fill the growing gap between the flange and the cord. I brushed in the drop, then wiggled the cord gently back ands forth in order to work the liquid into the gap and to fill the spaces. Then I brushed a second drop around the entire joint to seal and fill the area
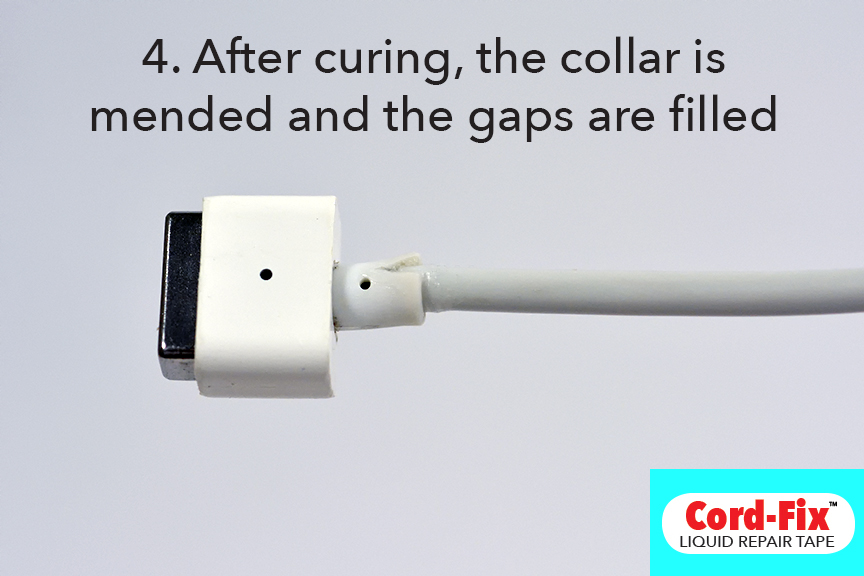
And it worked. Cord-Fix quickly filled the gaps, sealed the break, and stop the fraying. And it stayed flexible. Will it need another coat? Possibly, but for now the problem is solved and my charger cord is repaired. Yay!